Archer
Community Owner


Posts : 195
Join date : 2013-11-04
Location : United Kingdom
 |  Subject: Atlas II Campaign - Phase Two - Operation Thunderstrike Subject: Atlas II Campaign - Phase Two - Operation Thunderstrike  Fri Sep 05, 2014 9:31 am Fri Sep 05, 2014 9:31 am | |
| Welcome to the N.I.A Database - Please Login to ensure full confirmation.
LOGIN USERNAME: XXXXXXXXXX
PASSWORD: XXXXXXXXX
PLEASE WAIT......
..........
......
....
...
..
.
Login Confirmed! Welcome XXX. XXXXXXX XXXX
*OPENING FILE - OPERATION THUNDERSTRIKE*
..........
......
....
...
..
. Campaign:- Atlas II Campaign - Phase Two - Assault
Operation Name:- Operation Thunderstrike
Elements of Regiments / Detachments:-
18th Infantry Division
- Able - Zulu
31st Infantry Division [Reserves]
- Foxtrot - Golf
54th Infantry Division
- Able - Zulu
A.D.F [Atlas Defense Force]
18th Medical Detachment
20th Medical Detachment
34th Medical Detachment
18th Engineering Detachment
17th Engineering Detachment
25th Engineering Detachment
35th Naval Fleet
10th Armoured Corps
5th Armoured Corps
13th Logistics Regiment
31st Logistics Regiment
Initiation Phrase:- "Pluto"
Situation:-
After the N.I.A push forward both from the ground and also from the Mageran Republics own lines, the N.I.A has squeezed out all vital enemy posistions which were keeping a tough stalemate between both the ADF and Reserve forces of the N.I.A and the Mageran Republic. These lines held quite strong until the counter-invasion conducted by many elements of the N.I.A which sent troops to destroy and also secure key areas behind their lines on the same day as a large attack against the Mageran frontline posistions.
Many casualties on both side were suffered, but it resulted on an N.I.A victory on the frontline and also gained plenty of ground behind the Mageran lines along with that. After both the front and the troops dropped behind the Mageran lines met and regrouped and held off all Mageran counter attacks, the N.I.A are going to push forward in order to push deeper in to Mageran lines, hopefully cripping both supply and garrisons which are important to both the N.I.A and also the Mageran Republic.
Teams are once again going to be dropped behind the Mageran lines, in support of using both vehicular support and armoured support in the Area. Attemping to take multiple bridges in order to create a spearhead deep into occupied enemy territory, hopefully in which will bring a large blow straight through the Mageran lines which could cripple them for good in Atlas II.
Briefing:-
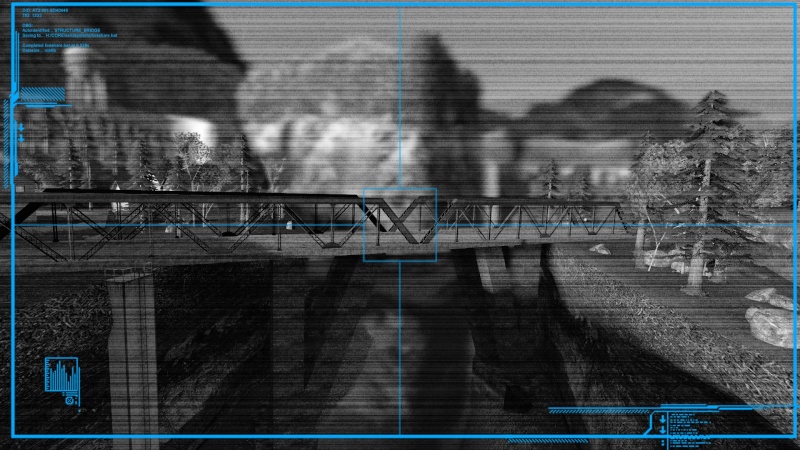
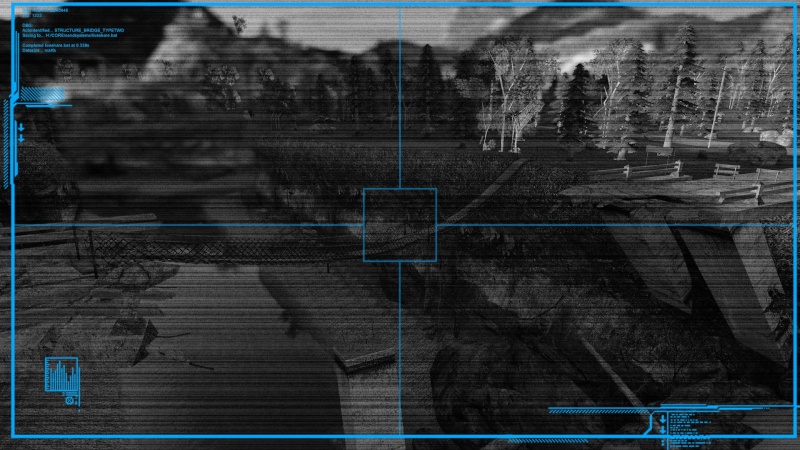
Objective One:- Secure - Main Bridge
This is our main objective, the bridge. Without the bridge this entire Operation goes to absolute chaos. It'll take us a long time for us to repair the bridges. This giving time for the Mageran to regroup and also resupply themselves behind those lines and give absolute hell to any other company which is sent further behind enemy lines to capture other bridges in which the Magera use for their own personal supply systems. Without this bridge, we don't know how long it'll take until we get a replacement. We need this bridge for ourselves, but it is not believed that the Magera will give it up straight away it is just as important to them as us. So be careful to how you approach this.
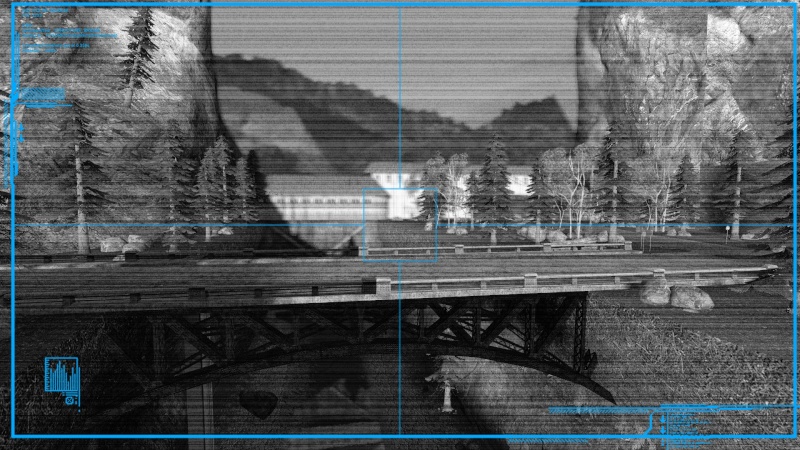
Objective Two: Secure - First Bridge
Once again, this bridge is important. Just as important as the 'Main' bridge. Though this one they can easily destroy it and it will have no harm done on their side. It is not believed they're wanting to keep this bridge up for any longer in order tokeep their grasp on their side of the line. But do not at all keep this bridge unguarded, it cannot be stressed anymore on much time and effort will be wasted if these bridges are to be destroyed. It needs to be secured.
Objective Three: Secure / Destroy - Mageran Bunker
I'm sure that you are not all suprised that they have more of these things. But scans indicate that this bunker is not as large as the one you all secured in your own sector back during the initial drop. So this one doesn't seem very important to either keep or keep around. Though that is up to yourselves in order to decide, but there is no doubt this can serve for an outpost for C Company to take in order to at least keep a large hold on this sector.
Objective Four: Secure Chapal
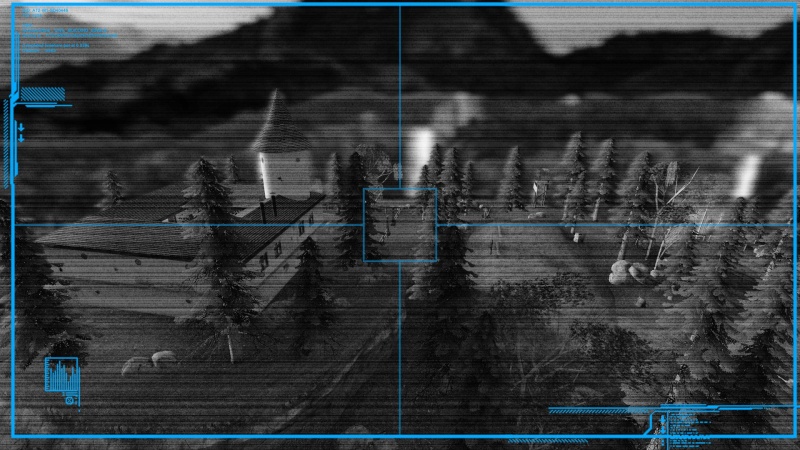
Another chapel which is going to cause a lot of trouble for the advancing N.I.A. I know of you all in C Company having problems last time, but hopefully this one could be deemed less of a failure and hopefully this could be taken for anything which could be important in the future. This chapel we have no idea what is inside it. But this watches the entire area surrounding this entire sector, it is the highest point of the Mageran territory and it could prove to be a large threat towards you all when you move in. Spotters, Snipers anything along those lines could be stationed up there, so be careful if you risk yourselves in order to take this Chapel. Though due to it being so high up there is a possibility this could also be used for a Communications relay for both the sector and any other surrounding sector which the Mageran occupy. So this could be a risk worth taking and it could also possibly save a lot of lives for this Operation.
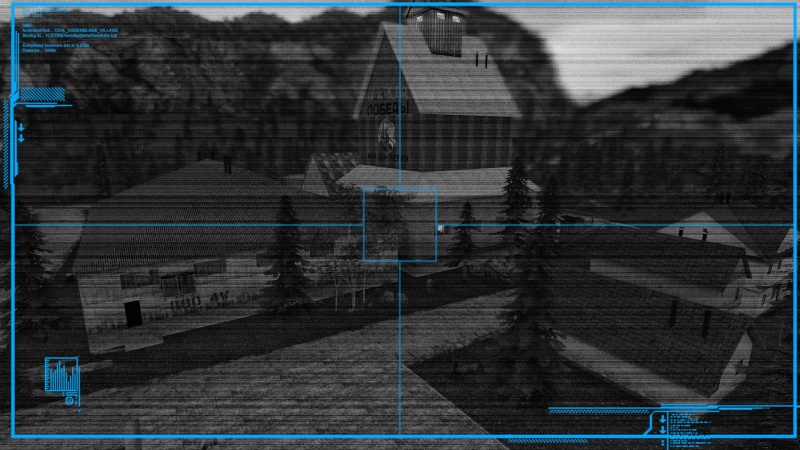
Objective Five: Secure Industrial Town
This might be noticeable from the intelligence photos we gathered from our intelligence gathering we did before we move there. It is completely unknown to when they destroyed the bridge close to this town, but the town now has a footbridge leading across it which leads to one small town. The road which leads from this town secures the back end of the bridge in which we are tasked to take. The main bridge being only so close down the road. This is not an ideal route to take without real support from the main front. This should be one of the last areas in which you should push through from.
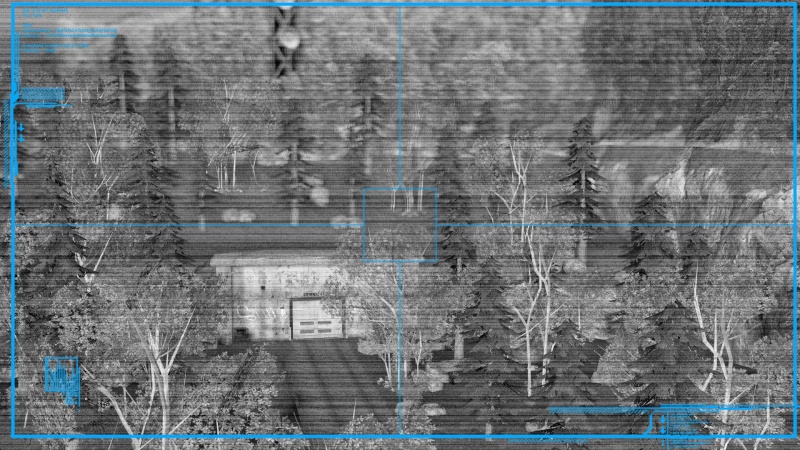
Objective Six: Secure Depot
This area may seem as a casual little junkyard in the middle of nowhere. But movement indicates that this is a way in order to distribute supplies and equipment throughout the areas. It's a possibility that the shack could hold some equipment which might be important to us. It could also be a possible communications relay. The Magera do seem to enjoy hiding things inside these places. But don't bet on anything being important here. Intelligence photos suggests that there could be nothing here at all, the movement is just something we've noticed. | |
|